
Installing an Engine in your car is not as hard as it sounds.
How to Change a Vehicle Engine
Changing a car engine is among the more difficult jobs a mechanic might ever encounter. Mounting a motor requires various strategies for every single year, make and model, so it’s essential to utilize a service manual specific to your car when taking on such a huge job. While the procedure might vary from car to car, some elements of an engine swap are rather universal, and this can be considered a basic outline of the procedures required.
Part 1 Removing the Old Engine
1
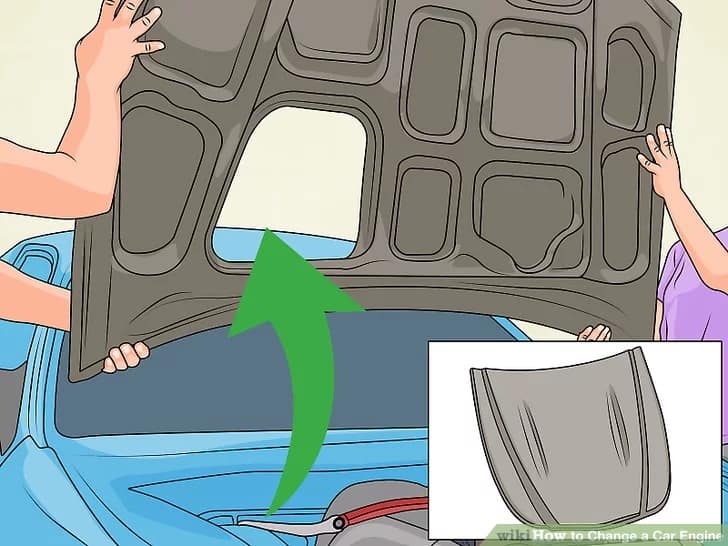
Remove the hood
While the majority of tasks done “under the hood” can be done under a hood that’s still in place, getting rid of the engine from your car is likely not one of them. The hood may hinder your ability to access connections or bolts as well as will certainly create issues if you lift the engine out of the engine bay using a cherry picker or engine hoist. The hood will be kept in place by hinges on each side with 2 or three bolts. You, and also a friend, will each need to support the hood as you each un-screw the bolts connecting the hood to the hinges. When the bolts have been separated, raise the hood off the vehicle.
- Removing the hood is a certainly a two-person job, as one individual will have to lift each end.
- Screw the bolts back into the hood in order to not lose them.
- Place the hood in a safe location, with cloth pads at each point it might come into the contact with the ground to avoid harming the paint.
2
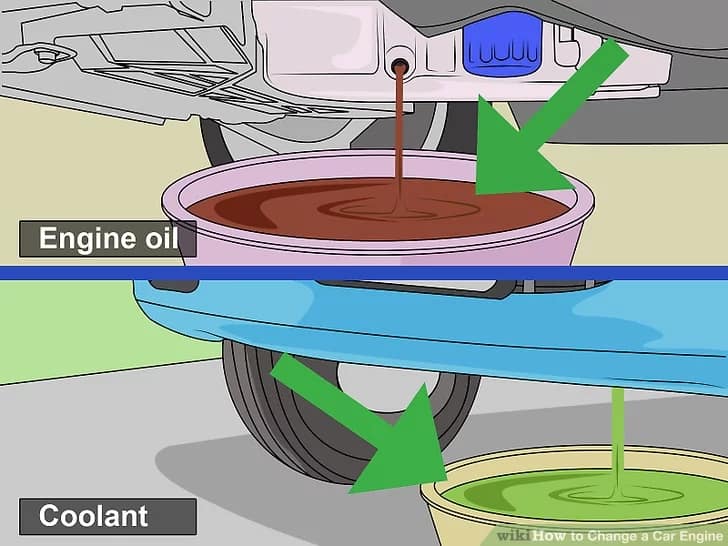
Drain all fluids from the engine
An engine makes use of a few fluids in regular use. All of it will be required to be drained prior to removing the engine. Start with the engine oil, which can be drained via the oil drain plug on the oil pan. The coolant can be drained from the radiator petcock. Keep in mind that there will still be coolant throughout the system as you disconnect coolant lines. The washer liquid reservoir is most likely affixed to the body of the vehicle. When not attached to the engine, it can be left alone.
- The fluids drained from your vehicle cannot be re-used in the new engine.
- Drain engine oil and coolant into separate containers for later recycling.
- You can bring oil and coolant to many auto parts stores to be recycled for free.
- If not used correctly, starting fluid can cause damage to the engine.
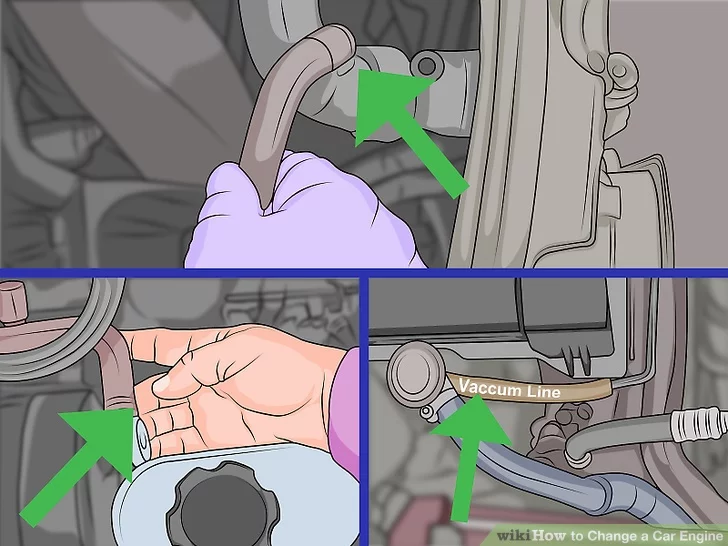
3
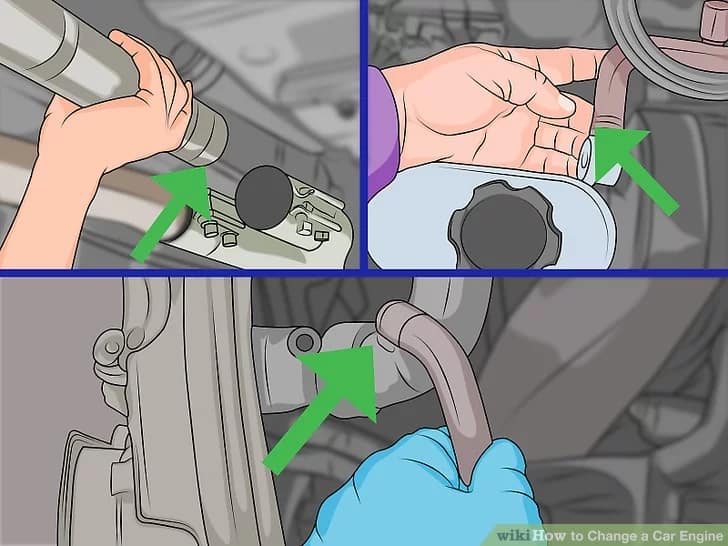
Disconnect the intake, exhaust and coolant lines
The intake draws air into your engine. It also appears like a pipe or tube traveling from the air filter to the throttle body. Separate the pipe from the throttle body. After that remove all the bolts holding the intake in place as well as remove it from the engine bay. You might or may not need to eliminate the radiator in order to remove the old engine. However, you will absolutely need to detach the coolant lines traveling from the radiator to the old engine. The exhaust can be unbolted at the end of the exhaust manifold.
- Expect coolant lines to drip or pour coolant as they are disconnected, so place a container beneath each as you disconnect them.
- Refer to your vehicle’s service manual to ensure you have located and disconnected all necessary coolant lines.
- Remember that removing the exhaust bolts can be extremely difficult. Spray the bolts with WD40 and use a breaker bar to remove them, but be careful not to break the bolts.
4
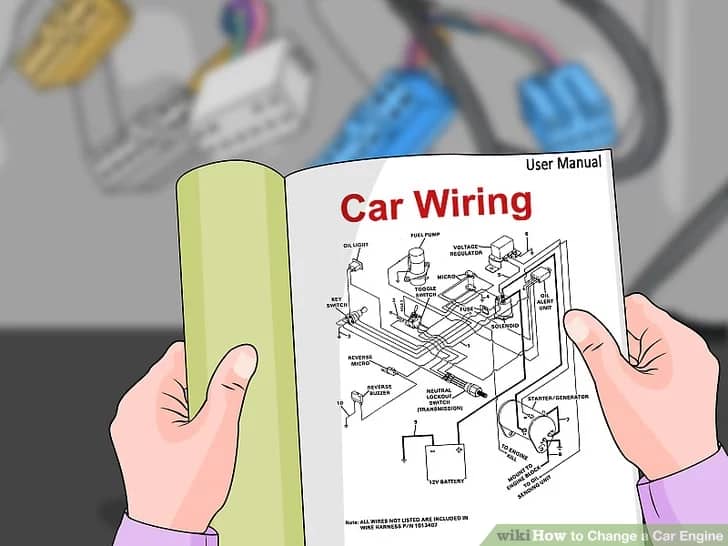
Disconnect the electrical wiring
Depending on the era of your vehicle, there is a wide variety of wiring possibilities that you may need to address when conducting an engine swap. The more modern the vehicle, the more wiring and sensors you’ll often have to contend with when disconnecting the engine. Be careful not to damage the connectors as you pull them apart, as they are usually made of plastic that can become brittle.
- Refer to a service manual specific to your vehicle’s year, make and model to ensure you disconnect all of the appropriate connections.
- Older, carbureted motors may have fairly few wired connections to contend with, while brand new cars often have many electrical connections.
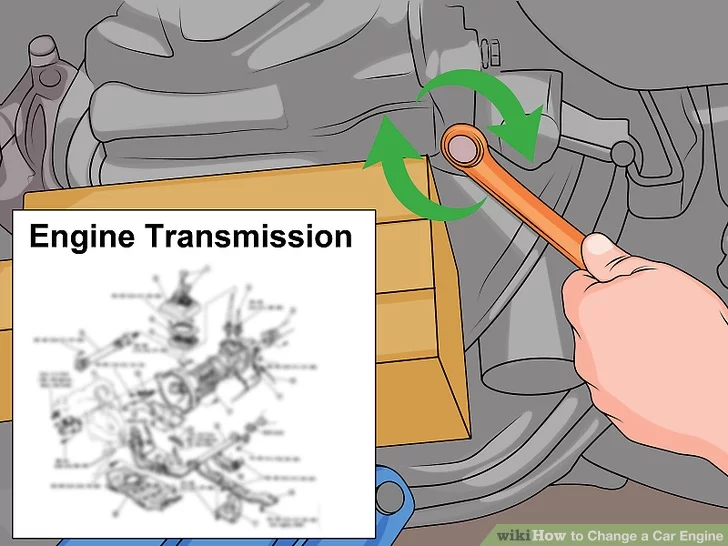
5
Unbolt the engine from the transmission
Depending on how the engine is mounted in the vehicle’s engine bay, the transmission may either be behind or to the side of the engine. The bell housing of the transmission fits into place at the back of the engine, or opposite where you will find the serpentine or drive belt. Remove all of the bolts that pass through the bell housing of the transmission and into the engine block. Place a transmission jack below the transmission to support its weight once it is no longer connected to the engine.
- Be very careful not to strip the bolts that connect the transmission to the engine block, as it will be very difficult to drill and tap out bolts with broken heads.
- Do not remove the bolts one at a time. Instead, loosen each of them a bit at a time until they are all hand loose before removing them.
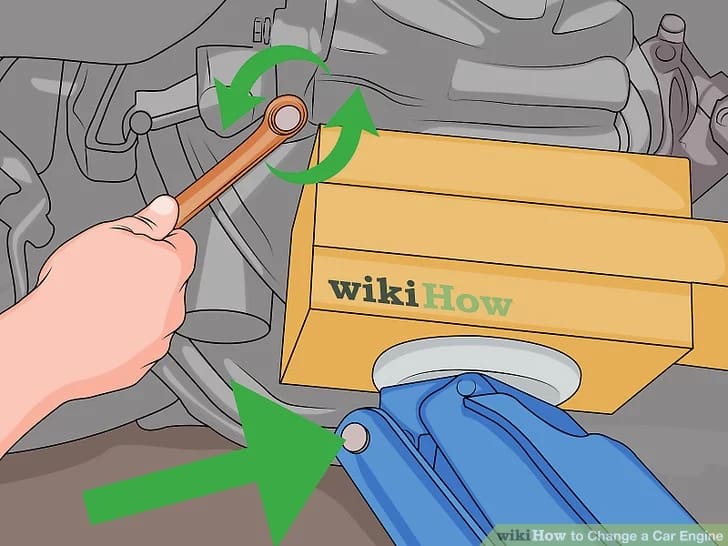
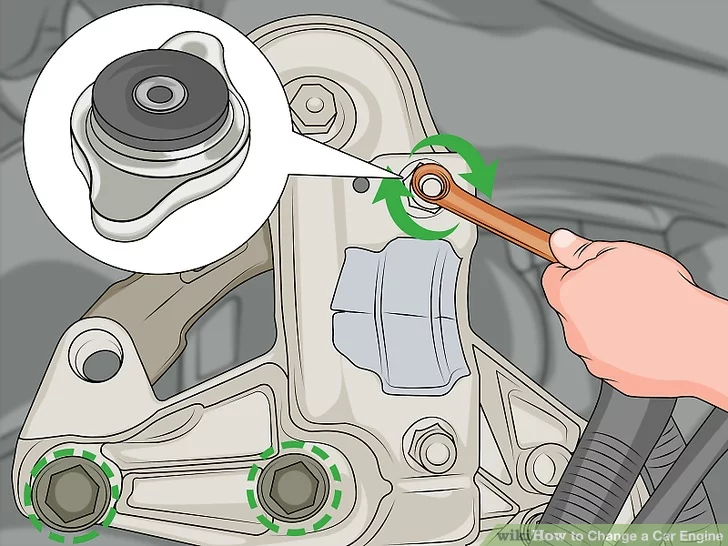
6
Disconnect the motor mount bolts
The engine in your vehicle is likely connected by three motor mounts, with the fourth serving as the transmission mount. These motor mounts are usually made up of steel and rubber (to absorb engine vibration) with a single bolt passing through the mount to secure the engine. You will need to use a wrench on one end of the motor mount bolt to hold it in place as you use another wrench to loosen and remove the nut from the other side. If you are using a cherry picker to lift the engine out of the engine bay, use your vehicle’s service manual to locate the points to bolt the chain to the engine without doing any damage, and put the chains in place as you remove the motor mounts.
- If you intend to lower the engine out of the bottom of the vehicle, you will likely need to remove a cross member and place an engine jack beneath the engine.
- With the motor mount bolts removed, the engine will now be supported by the cherry picker or engine jack.
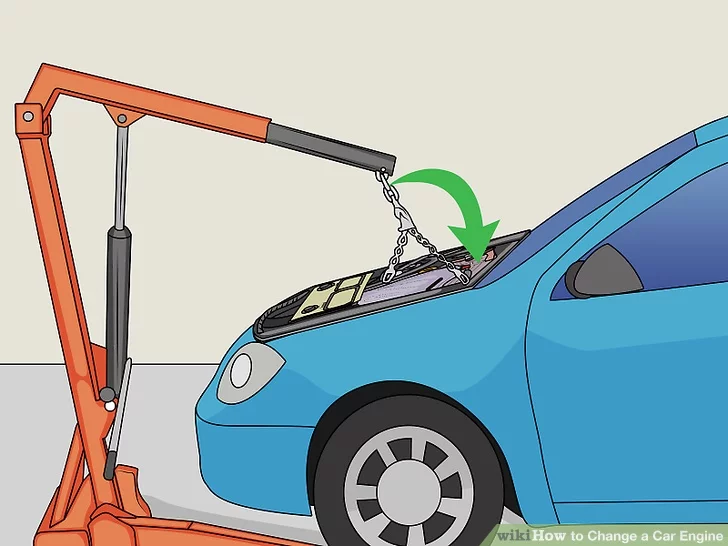
7
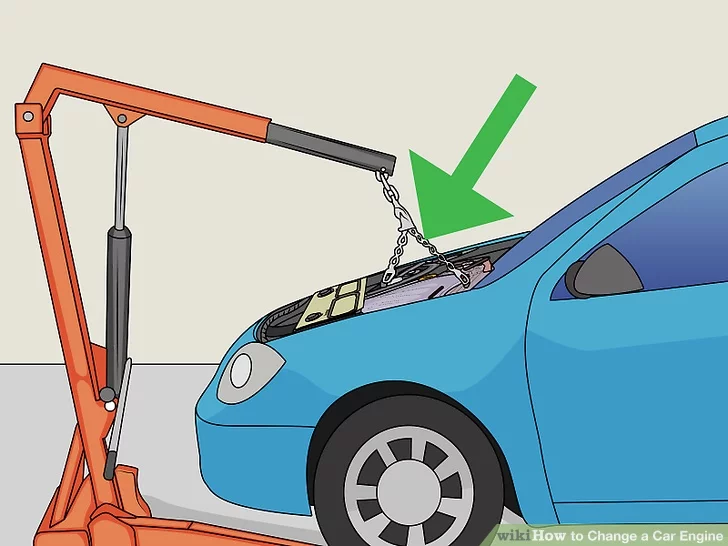
Either raise or lower the engine from the engine bay
Depending on the design of your vehicle, it may be easier to raise the engine out of the engine bay. You’d do this using a cherry picker. Or, you could leave the engine where it is and raise the vehicle itself over it. If you are using a professional lift, raising the vehicle above the engine is fairly straightforward, but most home mechanics may struggle to lift the vehicle above the engine.
- Have a friend jack the engine up using the cherry picker, as you carefully guide the engine to ensure it doesn’t begin to swing dangerously.
- Allowing the engine to swing around could cause damage to the engine or your vehicle and can easily injure you.
- Be extremely careful not to get a finger or hand pinched between a swinging engine and the engine bay, as most engines weigh hundreds of pounds.

Part 2 Installing the New Engine/Mounting the Motor
1
Locate a good replacement
There are two primary methods of locating a replacement engine: new or rebuilt motors or motors from donor cars. New and rebuilt motors can be purchased from a number of online retailers. Brand new motors are commonly called “crate” engines and offer the reliability of a brand new engine. Rebuilt or refurbished motors were removed from donor cars and disassembled to identify any issues, then reassembled with new gaskets. Both new and rebuilt motors are reliable, and both can often be bought with a warranty. Donor engines are often the least expensive, as they are simply removed from another car and placed into yours.
- Donor engines can sometimes be extremely easy to install, especially if both your vehicle and the donor vehicle are at your garage.
- Crate motors are the most expensive, but offer the highest level of reliability.
- Rebuilt and refurbished motors tend to cost slightly less, but are still considered quite reliable.
2
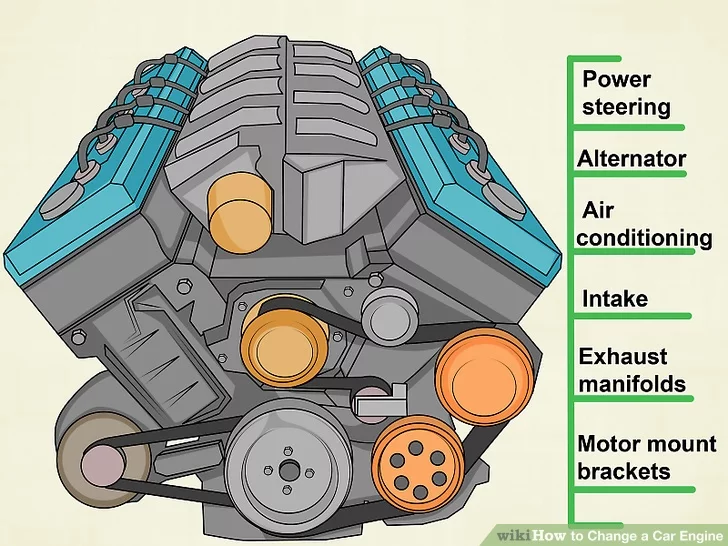
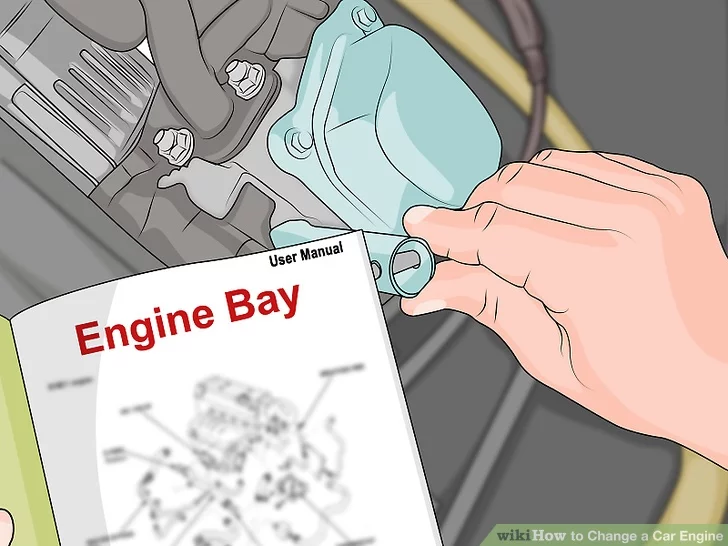
Visually inspect the new engine compared to the old
Before installing the new engine, compare it to the one you just removed to ensure they match. Because the same vehicle may have come with multiple engines in the same model year and there may be dozens of variations over the years, it’s important to verify the new engine will bolt in exactly as the old one did. Look for the placement of the accessories (like power steering, alternator and air conditioning) as well as the location of the intake and exhaust manifolds and motor mount brackets.
- If the new engine is missing any accessory components like power steering, it may be easier to remove it from the old engine and install it on the new one before it is placed into the engine bay.
- Engine blocks often have engine codes cast into them. If you locate the engine code, refer it to your vehicle’s service manual to ensure it is the proper engine for the vehicle.
3
Either lower or raise the new engine into the engine bay
Place the new engine in the engine bay using the same method you used to remove the old one. If you are lowering the engine into place, have a friend slowly and carefully release the pressure in the cherry picker as you guide the engine into place. Take great care to slide the engine into place over the input shaft of the transmission without damaging it.
- The engine may want to twist in the chains as it is lowered by a cherry picker, so be careful to keep the engine aligned properly.
- Do not release all of the tension in the cherry picker once the engine is in place.
- If you lower the vehicle down over the engine, take great care to ensure it is lined up properly to avoid doing damage to the body of the vehicle or the engine.
4
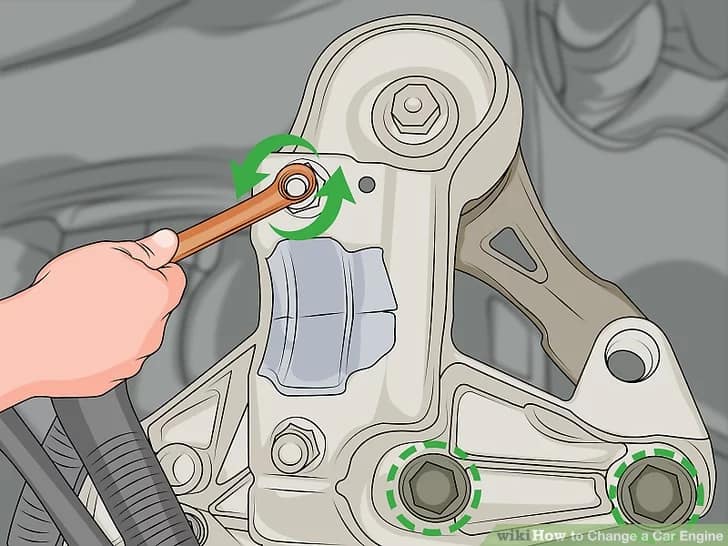
Bolt the engine in place using the motor mounts
With the engine in place, slide the motor mount bolts through the motor mounts and secure them using two wrenches. Make sure to have all three motor mounts connected and tight before releasing the tension on the cherry picker and allowing the car to support the weight of the engine.
- Before connecting the new motor mounts, inspect them for damage. If the rubber bushings are cracked or damaged, you should replace them before installing the new engine.
- Reduce the pressure on the cherry picker slowly to ensure the motor mounts will support the weight of the engine.
5
Connect the engine to the transmission
Using the same bolts you removed from the bell housing of the transmission, connect the new engine to the old transmission. Make sure the transmission’s bell housing slides into place and is flush against the engine block and is not at any kind of an angle as you tighten the bolts.
- Refer to your vehicle’s service manual to find out the specific torque specifications required for the bolts connecting your transmission to the engine.
- You may need to use a torque wrench to ensure you place the proper force into tightening these bolts.
Part 3 Connecting the New Engine
1
Connect the engine wiring harness
Depending on the make, year, and model of your vehicle, connecting the engine wiring harness may be a simple or an incredibly complex endeavor. If the new engine and the old are exactly the same, it will simplify the process of locating and connecting each of the necessary wires, sensors and connections.
- New model vehicles have far more wiring to contend with.
- Failing to connect the wiring harness properly can prevent the engine from running, make it run poorly, or affect the interior operations of the vehicle such as the gauge’s operation.
2
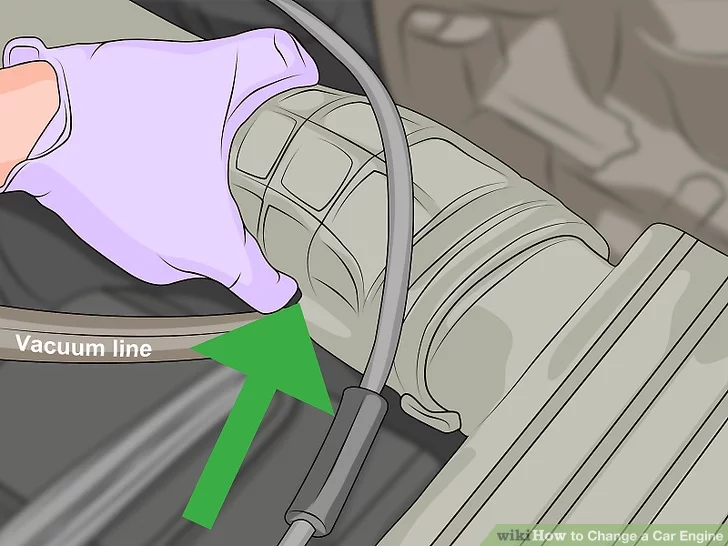
Run all the necessary connections
Reconnect the coolant lines and all other connections you had to separate when removing the old engine. If you needed to remove components from your old engine to install on your new one, such as the intake manifold or fuel rail, be sure to connect these as well. Use your vehicle’s service manual to locate and connect all coolant, vacuum, and fuel lines that must be present to make your vehicle run properly.
- This is likely the most time consuming step in the process, as there are a number of connections to address.
- Clearances should not be an issue with a replacement motor when running the connections
3
Install the intake
Reinstall the intake, connecting it to the air filter and mass airflow sensor (if equipped) on one end and the throttle body on the other. Many intakes are supported by mounting brackets that will also need to be secured.
- There should be at least one vacuum line connecting to your intake from the cylinder head, but some vehicles may have others.
- There should be no open nipples or nozzles on the intake anywhere once installed.
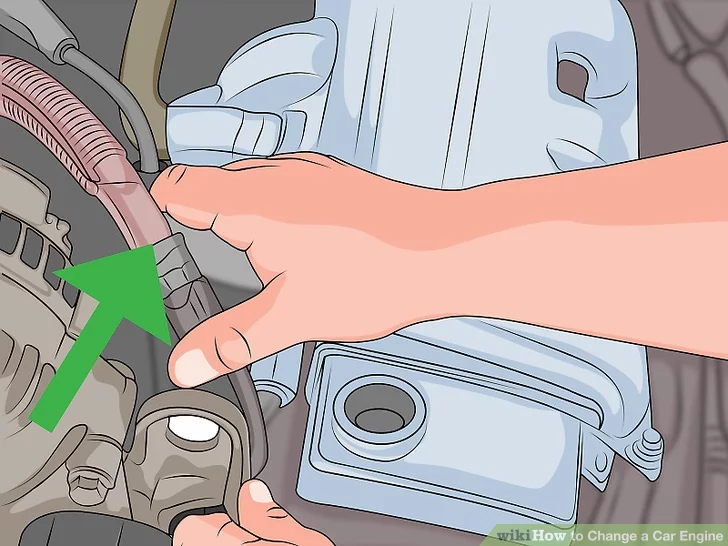
4
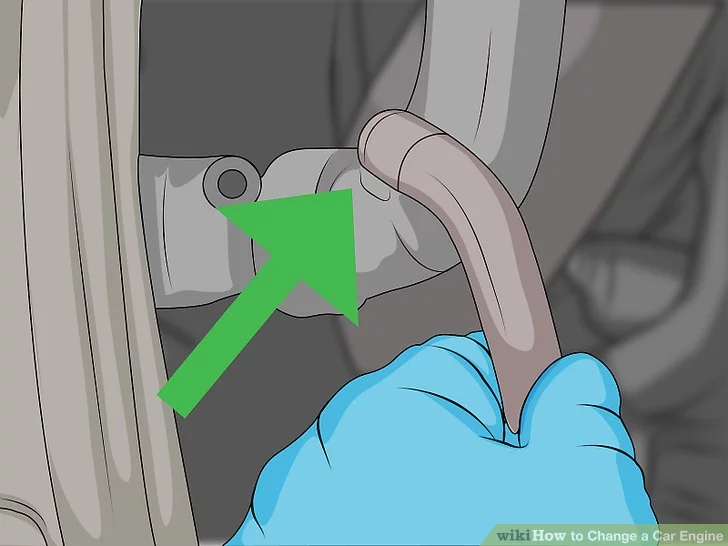
Connect the coolant lines
Reconnect the coolant lines to the radiator in the same way you removed them. Many coolant lines will require a hand wrench or Phillips head screwdriver to tighten over their respective pipes. Make sure all connections are tight but be careful not to overtighten them and crack the plastic piping.
- If any of the hose clamps used on the coolant lines seem unusable, you can purchase replacement ones at most auto parts stores.
5
Look over your work for what you’ve missed
An engine needs air, fuel and spark to run, so start by making sure the intake, fuel lines and electrical system are all installed and intact. Then start running through the rest of the connections you’ve made, ensuring each is tight and in its proper place. Refer to your vehicle’s service manual regularly as you compare its diagrams to what you see in your engine bay to be sure everything has been installed properly.
- If you see an issue, it may be daunting to take things back apart to address it but starting the engine with something connected poorly or incorrectly can cause serious damage to your new engine.
- You may want to ask a friend to look things over as well, in case they notice something you’ve missed.
6
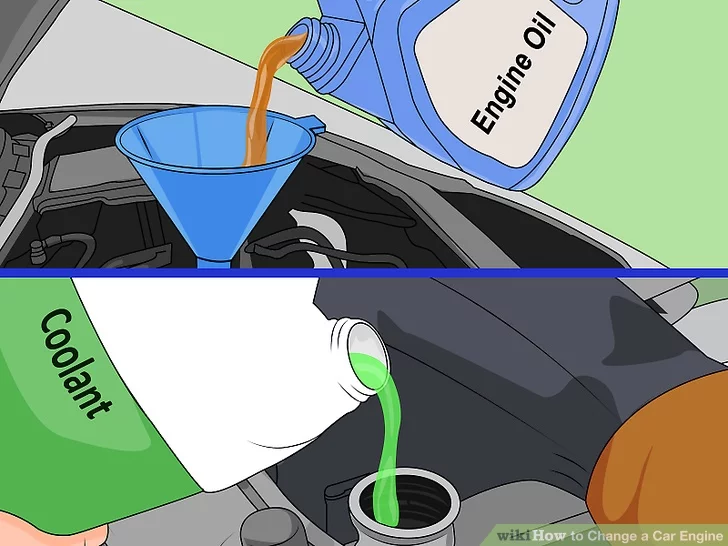
Add oil and coolant
With everything in place, refill your radiator with a 50/50 water and coolant mix and add the appropriate amount of oil to the engine. Refer to your vehicle’s service manual for fluid capacities and ensure you meet them.
- With everything connected and the fluids refilled, the vehicle should be ready to run.
- Turn the car over without letting it start a few times (by turning the key as though you want to start it, and then back quickly) to prime the fuel pump and being pumping oil through the engine before starting it for the first time.
7
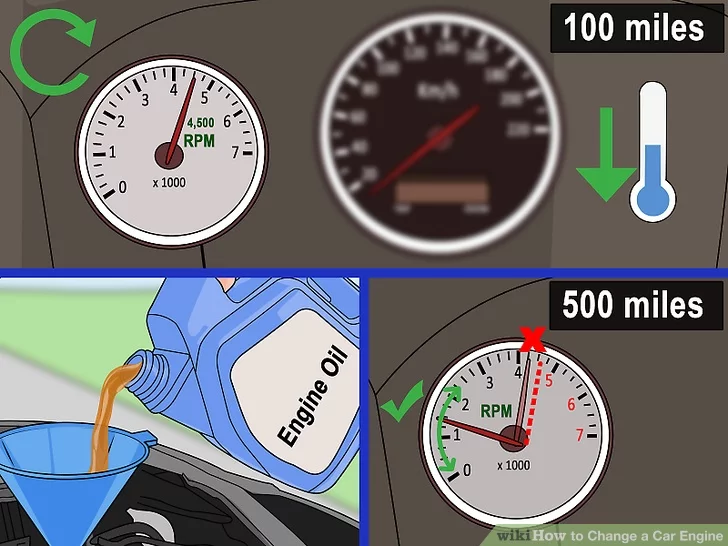
Break in new and rebuilt motors
New internal engine components must wear together under certain conditions before they can perform their best. This is referred to as “breaking them in.” Start by driving the car at varying speeds for the first two hundred or so miles. Then, take a few medium throttle accelerations up to around 4,500 RPMs and allow the engine to cool completely. Repeat this with heavy throttle a few times, and allow it to cool again. Then change the oil. Drive the car for another 500 miles regularly, without exceeding the red line for your vehicle to finish the break in.
- Properly breaking in a motor can prolong its life and ensure it performs properly.
- Do not drive the vehicle aggressively until after you’ve broken it in for 500-700 miles.
This article comes from wikiHow and Co-authored by Jason Shackelford