We’re
going to talk today in this segment about air launchers. The launcher we’re
going to talk about specifically is a Stroud, part number STR 4904, which you
can find at Uzbasic Motorsports Performance Parts. But let’s get going. And
let’s talk a little bit about what we have. And what we’re going to, as you can
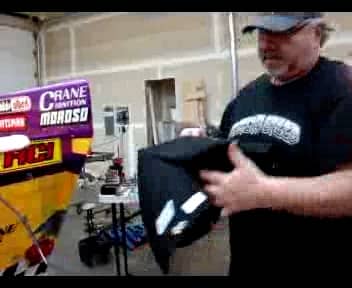
see on the table over here, this is the unit that we used to have the old
spring, right, a lot of tension in this baby.
Spring Launchers
I used
this for many years, but I call this the backbreaking knuckle smashing cuss
word swearing, here, Oh chute, because every time you had to try to get this
thing in there, you almost have to have two men and a small boy to get this
thing actually in position, and then it would pop out at times. And, you know,
just a bad situation at times. So, what we ended up doing is getting rid of
these little jewels. And what we did is we went to the Stroud air launchers,
like I was telling you about now, kind of give you an idea about what’s in the
kit. The kit comes obviously, with the launching or the plate, the piston, the
pneumatic piston, comes with the bags that fit over the top of the piston and
the actual chute plate here. As well as a valve. Now this valve, basically,
it’s pretty unique. Because what it is, it is an activator where you can turn
it on to apply air. So, when you’re ready to pop the chutes, they’ll deploy.
And then when you come back, you just have to throw this off and it releases all
the air pressure so that you can push the pistons literally back in when you’re
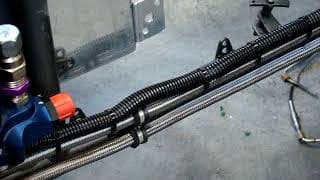
done when they’re deployed. So awesome part also comes with various fittings,
it comes with T’s, straights, as well as I installed this already to 90
degrees. It also comes with a complete D bag and a mini shoot, if you will. So
now what we’re going to do is we’re actually going to go over this today and
kind of give you an idea about installing. So what we’re going to do is we’re
gonna go to the back of the car over here. And as you can see right here, we
already have the brackets installed.
Measure Everything
Now,
these have been already measured, centered, and adjusted based on a two-chute
program, right and to just to speed the process up. But as you can see, you
have to take the time to measure and be sure everything is square straight.
Also, these happen to be at a 30-degree angle. And the idea behind that is
recommended so that when the chutes deploy, they deploy out and up. So, you can
get them up into the air as soon as possible. So they can blossom without any
issues or get caught in anything else.

Okay.
Very important now, kind of to do some of the actual installation itself, we’re
going to do is when you get to the actual parts from Stroud, this plate as you
can see already has the holes drilled, they are not drilled. So what you’ll do
is these are finished tabs or mounting tabs. What you’ll need to do is
literally placed this over the top of this Gizmo here. Keep it straight, line
all the holes based on the tabs, then mark the back plate, remove these and
then drill the holes out in the back now important, please don’t forget this.
What’s your first what you’ll want to do is just stick this down and drill it.
You
do not want to put any kind of pressure at all on this app this assembly right
here. So, what I would recommend is open up your vice lightly put it on top of
the vice so
that the pressure is on this part, not on this part and then drill each one of
your holes out. Now, after you have your hole drilled out, what you’ll want to do
is you’ll come over to the actual bag. And what you’ll do is you can see these
are already predrilled. As you can see there’s four holes predrilled but what
you’ll want to do in this case, simply slide the piston through here.
So, it varies
on the bottom, be sure your Stroud is on top and then mark every one of these
holes against the fabric on each one of the four points, then what you’ll do is
you’ll remove the bag, easier
said than done.
Drill the Holes
And
then drill each one of the holes out in the fabric, because the idea behind
that is you’re going to be sending a small bolt through the fab or through the
plate through the fabric through the tab, and you’ll have a nut that you’re
going to install on the back end to secure all of this to actually the chute
bracket. Now, another step that you’ll have to end up doing is right here. In
this application, I actually pin these in place. there already is a hole
drilled in here in this receiver if you will. So, what I’m going to do now is
I’m going to simply drill and finish drilling out the pilot holes. As you can
see, what I just did is I will be finishing up and drilling the one on the
right side and on the other side the right and left side so that it’ll will
receive these
pins so that this will pin this all in place. Then I come down here because now
I have the chute right. We’ve got now everything has been everything it’s been
drilled, everything has been through the fabric, we’ve got the back part of it
all finished. Now for the last part, what we’re going to be doing is we’re
literally going to bring this bolt through here into this spacer right, but
this spacer is going to be actually around the chute and we’re going to put a
lock nut on this side. The idea behind this is as when the chutes deploy this
is actually welded TIG welded into the car frame. So when this thing deploys,
and it catches air at 180, 200 miles an hour, it has a real strong focal point
to grab on to so nothing is damaged basically. So now what we have is we have
the actual chutes in position, Okay, now like I said, basically this chute is
now on the
car. The idea is now to put this screw into each one of these holes. And folks
this is a process sometimes.
Use the T-Connector

Okay, so
basically, the chute now is in position where you want to have it you’ll have
all four of these bolts into the, in the, through the chute through the fabric
into these back tabs, and mounting. Now, what you’ll do is depending on the
situation, in this case, we actually have two chutes. So we’re going to use
this T, but it’s really simple. All you need to do is push this into that. push
that into that fitting and then what all you do here is bring this backup, which
will plug into this T assembly right here. So what we’ll do is we’re going to
hit we’re going to stop for this time being we’ll be back in a second to show
you what it looks like when it’s installed.
Go to check out the parachute launchers and accessories that we have available on
Stroud Safety.
Would you like to watch the video with me discussing parachute installation? Watch it
here.